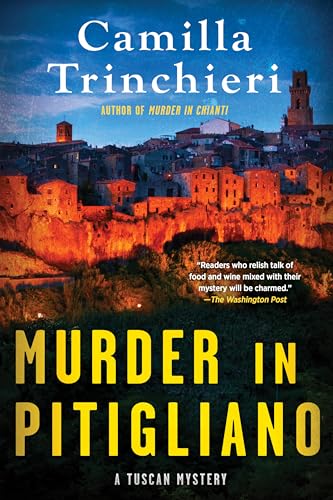
• Skip to main content
  • Skip to primary sidebar

HitEbooks

Hit Tips About EBooks

Inserting Pictures in MS PowerPoint 2016

MS Powerpoint 2016 is an amazing application for creating some stellar presentations. Over the course of the time creating presentations has become a very simple affair . In this tutorial you will learn how to add pictures in MS PowerPoint 2016. Pictures can made the presentations very interesting and engaging. Picture can be inserted from a file on your computer onto any of the slide. MS PowerPoint lets you add online pictures and also screenshots to your presentation. You can also learn about Saving Space in WinSxS Folder in Windows 10.

Adding Pictures from a File:

In order to add pictures from a file you need to follow these steps.

  • 1st of all you need to select the Insert tab and then click the Pictures command in the Images group.
  • You will notice that a dialog box will appear and you need to locate and select the desired image file and then click Insert.
  • You will notice that a picture will appear on the currently selected slide.

Adding Online Pictures:

Now if there is no picture which you require on your computer you can find a picture online for adding it into your presentation. MS PowerPoint offers two options for finding the online pictures OneDrive and Bing Image Search.

OneDrive: You can insert an image that is stored on your OneDrive. You can also link other online accounts with Microsoft account like Facebook or Flickr etc.

Bing Image Search: You can use this option for searching the Internet for images.

For inserting the Online pictures you are required to follow these simple steps.

  • 1st of all select the Insert tab and then click the Online Pictures command.
  • The Insert Pictures dialog box will appear.
  • Now select the Bing Image Search or your OneDrive.
  • Press Enter key and your search will appear in the dialog box.
  • Now you need to select the desired image and then click Insert.
  • You will notice that the image will appear on the currently selected slide.

How to Save Space in WinSxS Folder in Windows 10

Windows 10 has got a folder which is called WinSxS and this folder is used for storing the files which are necessary for installing the Windows. These stored files can be used for backups as well as updates to those files. With every new update the WinSxS folder size will be increased. As the folder get bigger and bigger you need to clean it up from the unnecessary files and get the hard drive space back. You can’t delete all of the files as there are files which are required for running and updating the Windows reliably. You can also learn about SmartArt in MS Word 2016.

Cleaning Win SxS Folder by Using Disk Cleanup Tool:

In order to delete the older updates from WinSxS Folder by Disk Cleanup you need to follow these simple steps.

  • 1st of all you are required to open the Disk Clean Tool and for opening the tool you can type “disk cleanup” in the taskbar and the click “Disk Cleanup.”
  • Now you need to click on Cleanup System Files button.
  • Now check the box located next to Windows Update Cleanup.
  • IN the next step you need to click on OK. If you are not seeing Windows Update Cleanup option an Disk Cleanup it means there are no files to delete.

Cleaning Win SxS Folder by Using Command Prompt:

  • In order to clean the Win SxS folder with the use of Command Prompt you are required to follow these steps.
  • 1st of all you are required to launch the command prompt with the Admin priviledges.
  • In the next step you need to enter the command: Dism.exe /online /Cleanup-Image /StartComponentCleanup.
  • Now if you need clean up the folder by using the following the command in the Command Prompt: Dism.exe /online /Cleanup-Image /StartComponentCleanup.
  • After this command the cleanup process will start and the process may take some time.

SmartArt in MS Word 2016

MS Word is a handy text editor which can be used for creating impressive text documents. MS Word has got loads of tools and features in order to make documents easily. One of the features of MS Word is SmartArt which will let you communicate information with images instead of text. MS Word has got loads of styles to choose from which can be used for illustrating many different types of ideas. You can also learn about Installing and Deleting Fonts in Windows 10.

In order to insert SmartArt graphic you need to follow these simple steps.

  • 1st of all you need to place the insertion point in the document where you are require you SmartArt graphic to appear.
  • Now from the Insert tab you need to choose the SmartArt command in the Illustrations group.
  • A dialog box will appear and you have to select the category on the left side and select the desired SmartArt graphic and after that you need to click OK.
  • You will notice that the SmartArt graphic will appear in your document.

Adding Text to a SmartArt graphic:

  • 1st of all select the SmartArt graphic and you will notice that a text pane will appear on the left.
  • Now enter the text next to each of the bullet in the text pane. The text will appear in the corresponding shape. The text will be reshaped automatically in order to fit inside the shape.

Adding and Deleting Shapes:

  • It is quite an easy affair to add new shapes, changing their orders and also to delete shapes from your SmartArt graphic. All of this can be done with in a text pane.
  • In order to add a new shape you need to place the insertion point after the desired bullet and then press Enter. A new bullet will appear in the text pane and a new shape will appear in the graphic.
  • For removing a shape you need to just keep pressing the Backspace until the bullet is deleted. The shape will be removed.
  • « Go to Previous Page
  • Go to page 1
  • Go to page 2
  • Go to page 3
  • Go to page 4
  • Interim pages omitted …
  • Go to page 10
  • Go to Next Page »

Primary Sidebar

  • How To Guides
  • AutoCAD
  • Microsoft Office
  • Windows 10
  • Photoshop
  • PC Tips
  • Terms of Service
  • Privacy Policy
  • Terms of Service

Recent Posts

  • How to Send a Web Note in Edge Browser in Windows 10
  • Drawing a Polygon in AutoCAD
  • How to Draw a Plate with a Hole in AutoCAD
  • Inserting Pictures in MS PowerPoint 2016
  • How to Save Space in WinSxS Folder in Windows 10
  • SmartArt in MS Word 2016
  • How to Install and Delete Fonts in Windows 10
  • Working with Hatching or Filling Objects in AutoCAD
  • Drawing a Simple Plate with AutoCAD
  • AutoCAD Coordinates System
  • How to Password Protect a Folder in Windows 10
  • How to Turn Your Windows PC into a Wi-Fi Hotspot using Command Line
  • How to Turn Your Windows into a Wi-Fi Hotspot with Connectify
  • How to Send Email with Cortana in Windows 10
  • How to Add or Remove Cortana from Windows 10 Lock Screen

© Copyright 2017 All Rights Reserved ·